
A Stunning Kitchen Makeover

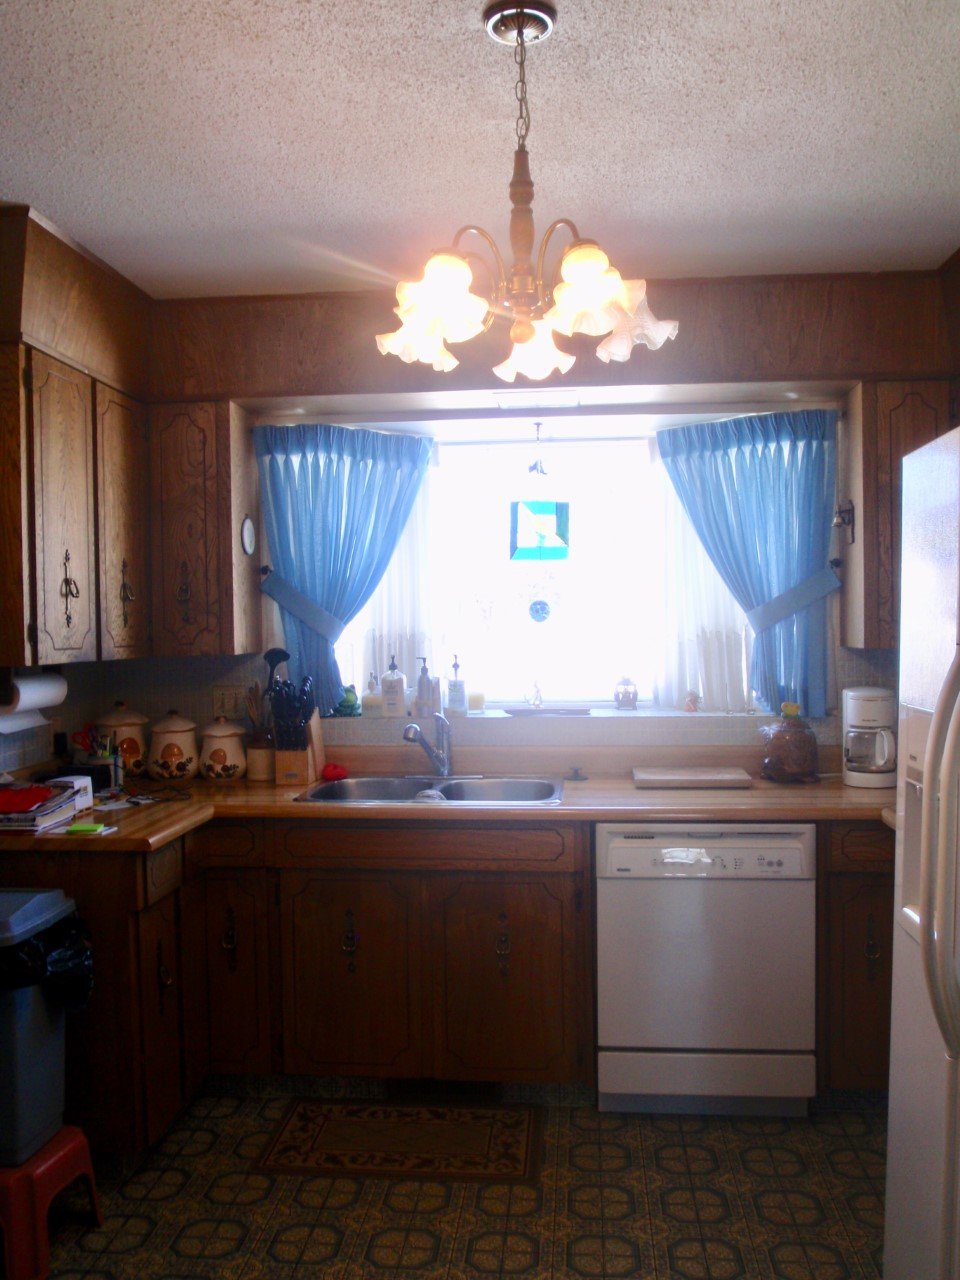
If you want to be blown away with some Before and After photos, you need to see what we did to my sister’s kitchen or should I say, her whole main floor. Let’s start with a little back story: my sister, Sandra and her husband bought this house from my parents. It’s the house we grew up in and made so many wonderful memories in! However, it was still living in the past...Yikes! The layout needed improvements to help with functionality; it was dark and extremely dated!
We played around with a few layouts and decided on this floor plan that included taking out the kitchen walls and moving the back-entryway stairs. Now, that sounds like a lot of work and it definitely was. Sandra and her husband, along with my parents, completely transformed this main floor. This was a huge project so I will break it down with each before and after photo on how we tackled this job by job to get to the beautiful finished ending. Of course, we got rid of the old curtains, updated the backsplash, new flooring, new countertops and new cabinets to make this feel like a whole new house!
They removed the walls that divided the kitchen and living room and put in a support beam. We used to run around those walls in circles chasing each other and driving our Mother mad because we would never be able to hear her in the living room when she was in the kitchen cooking. By taking those walls down it completely opened the space and made it so much brighter. It allowed them to create that open concept living space and have a massive island which is amazing for entertaining and for chasing the kids around!
We moved the back-entrance stairs so there would be a larger landing when you come up into the kitchen. By pushing that wall back and taking out the old pantry, it gave them a wider kitchen. This pantry was where we would always hide and scare people. However it was always disorganized and a disaster. Sandra was happy to see that gone. With more room in the kitchen, we could center the sink on the beautiful bay window leaving room to keep the dishwasher by the sink for functionality. We also give them a sliding garbage drawer.
Moving the back-entryway stairs created a straight line when leaving instead of turning around a corner giving them better flow when coming and going. As kids, we always had a pile of shoes in the corner that would drive Dad nuts as he would constantly be tripping on them. With three girls in the house we always had too many shoes. Now there is plenty storage off to the side that doesn’t cause any tripping hazards.
This house is a four-level split, so stairs everywhere. I don’t know how my Mom managed back then without baby gates. Having twins and a two and half year old sure kept her busy! The stairs were carpeted that wrapped around down to the other set of stairs. Laminate flooring was installed upstairs, with luxury vinyl plank on the main floor. The question was how to refinish the stairs to flow nicely with both the laminate and vinyl plank. The two floorings were similar colors but different materials so we needed a solution to make them flow nicely together. I came up with a solution and put my brother in-law to work having him rip the carpet off and sand down the wood treads and risers. After sanding, he painted the risers white and stained the treads the same color as the new beams installed. Since they have young children we added a decorative carpet runner for safety and comfort. It was a pretty inexpensive fix but don’t ask my brother in-law how long he sanded those stairs for!
With the stairs moved and the pantry gone, we had room to move the fridge and microwave over to that side of the kitchen. Thus, creating a perfect functioning kitchen triangle! Whenever I used the old microwave I would worry about spilling my food on my head when getting it out since it was installed so high. Us Martin’s aren’t the tallest in the bunch. So, we reinstalled the microwave at a safer height for all of us that are just over 5 feet.
With the stairs moved and the pantry gone, we had room to move the fridge and microwave over to that side of the kitchen. Thus, creating a perfect functioning kitchen triangle! Whenever I used the old microwave I would worry about spilling my food on my head when getting it out since it was installed so high. Us Martin’s aren’t the tallest in the bunch. So, we reinstalled the microwave at a safer height for all of us that are just over 5 feet.
We moved the built-in oven under the cook top to give room for a functional pantry where the old oven was. No one can pop out of this pantry to scare you! And the sliding shelves are amazing for organization. With the fridge gone as well, we had so much more space on this side. We centered the oven in that space allowing a little more room on either side of the cook top. We also installed a updated and shiny new hood fan to create a beautiful focal point!
Who doesn’t love a large island! The kids will now be chasing each other around the island installed of the dated walls. I did the island in a beautiful navy blue for some contrast to the rest of the kitchen that is a nice light grey. The island has plenty of storage and seating on both sides. We left space for a perching seat when prepping food on the one side. Also, we installed a central vac crumb catcher!
TIP: If you want to know how to save some money when doing your kitchen, here is a little trick we did. The island is in a beautiful solid surface but the rest of the kitchen is actually a matching plastic laminate...Shhhh you would have never known if I didn’t tell you. Everyone will conjugate around the island (the beautiful solid surface) and you will be doing all your prep work on your inexpensive but beautiful plastic laminate and no one will know unless you tell them! If you can’t find a plastic laminate that matches then I suggest you go completely different for a nice contrast.
This beautiful handmade dining table is stunning in front of the expansive bay window. The beautiful table and bench were made by our good family friend, Jenny McKinnon. Check out her page Haven Interiors. She has many memories in this house with us. Like when Jenny and our older sister would play hide and seek with Sandra and I but never come to find us. I can’t be the only one that there older sibling did that to. The table is big enough that the whole family can fit around it! I can’t forget to mention the beautiful wood plank ceiling. The original ceiling was a sparkle light blue popcorn style that had been painted white. My brother in-law had scraped all the other ceilings in the rest of the house and refinished them. However once a popcorn ceiling has been painted, scraping it off isn’t so easy. That is why I suggested just covering it up! They installed the tongue and grove wood plank and had someone come and spray it white to finish it off so nicely!
Kitchen renovations make a huge transformation in your home but they aren’t the easiest to live through. While the kitchen was under renovation Sandra was pregnant with her first child and still working. They had planned to install the cabinets in December before Christmas. But when the cabinets were delivered, they were all the wrong color beside the island color and some of island cabinets had broken parts. The floor and existing kitchen had already been taken out. She was without a ticket for months till the new ones came in. That also was a huge set back on their schedule to get it done before the baby came. Well as life has it, my nephew, Branson came early and the kitchen still had no floors and was in pieces. After bringing home Branson, my Brother in-law took time off work. Him and my Dad were able to hammer out the rest of the kitchen, all before family from out East came to stay with them just a month after Branson was born. If Branson was getting fussy they would just turn the shop vac on or start drilling something and he would go right back to sleep!


Finishes
Solid surface countertop - Caesarstone White Attica
Plastic lamitnate countertop - Formica 180FX Calacatta
Cabinet door style - New Haven
Main Cabinet colour - Nimbus
Island Cabinet colour - Gunmetal Blue
Faux beam finish - Varathane, Weathered Wood Accelerator
Paint colour – Beauti-tone - Window Ledge UP69-0 Urban
Paint colour - Beauti-tone - Rand-Moon E36-5-0532-0
xoxo Shar